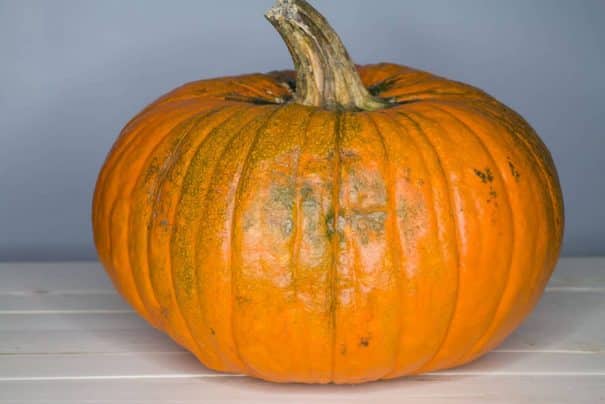
The crisp autumn air brings with it the undeniable charm of pumpkin season. Visions of vibrant orange gourds gracing porches and tables fill our minds. Yet, for many home gardeners, the reality can be a bit more challenging. You’ve nurtured your pumpkin patch for months, watched the vines sprawl, and seen the small green fruit emerge. Then, just as anticipation peaks, Mother Nature throws a curveball: an early frost threatens, or pests take their toll, leaving you with a patch full of beautiful, but stubbornly green, pumpkins. The heartbreak of seeing your hard work potentially go to waste is real. But what if there was an easy, frost-proof trick to salvage your harvest and transform those verdant spheres into their classic autumnal hue? Good news: there is! This comprehensive guide will show you how to turn pumpkins orange indoors, ensuring you don't miss out on the season's joy.
Why Your Pumpkins Might Still Be Green (And Why It Matters)
Often, the primary culprit behind unripened pumpkins is an unexpected drop in temperature. Jack Frost, as he’s affectionately known, has a knack for arriving earlier than anticipated, signaling the end of the growing season. Once frost hits the pumpkin plant, its ability to mature its fruit diminishes rapidly, sometimes halting the ripening process entirely. This is why it’s crucial to act swiftly when cold weather looms, as leaving them exposed can lead to irreversible damage.
However, frost isn't the only reason your pumpkins might not be turning orange on the vine. Sometimes, the plant itself succumbs to disease or insect infestations, cutting short its lifespan and leaving immature fruit. Accidental vine breakage during maintenance can also isolate a pumpkin from its life source, stopping its development. Regardless of the reason, the sight of a healthy-looking green pumpkin, so close yet so far from its orange destiny, can be disheartening. Thankfully, these aren't necessarily lost causes. With a little human intervention, many partially ripened, and even completely green, pumpkins can still achieve their full, vibrant color, ready for decoration, carving, or delicious culinary creations.
The Simple Secret: Warmth and Light – The Indoor Method
You might be surprised by just how simple the trick to ripening green pumpkins indoors truly is. There's no complex equipment, no secret potions, and no need for a science degree. The fundamental principle mirrors how many other fruits, like tomatoes, achieve their ripened color: controlled exposure to warmth and indirect light. When a pumpkin turns orange, it’s undergoing a natural process where chlorophyll (which makes it green) breaks down, revealing the underlying carotenoid pigments (which give it its orange color). This enzymatic process continues even after the pumpkin is removed from the vine, provided the conditions are right.
So, what’s the big secret? It’s truly remarkably straightforward: bring your green pumpkins inside and place them in a warm spot. That’s it! While direct, scorching sunlight isn't strictly necessary, a bright, warm location in your home is ideal. Think near a window (but not so close it gets super hot and risks cooking the pumpkin), on a sunny deck or patio (if outdoor temperatures are still consistently warm and frost-free, though our focus here is indoors), or even just a warm room. The goal is to provide a consistent, mild warmth that encourages the natural ripening process to continue. We've seen great success placing pumpkins anywhere from right next to a windowpane to several feet away, as long as the ambient temperature remains comfortable and stable. Within a few days to a couple of weeks, you'll witness the magic unfold as those stubborn green patches give way to a brilliant orange.
This method isn't just for the massive show pumpkins; it works equally well for smaller varieties like "Munchkins" or the beloved pie pumpkins. It’s a game-changer for anyone looking to maximize their harvest and enjoy pumpkins throughout the late autumn and early winter months for decorating or cooking. For a more detailed look at both indoor and outdoor ripening strategies, consider reading our article: How To Turn Green Pumpkins Orange: Inside & Outdoor Methods.
Preparing Your Green Pumpkins for Indoor Ripening
Before you bring your green treasures indoors, a little preparation can go a long way in ensuring success and preventing potential issues like rot.
- Timely Harvest: If frost is imminent or the plant is clearly declining, don’t hesitate. Pick your green pumpkins. It’s better to bring them inside slightly immature than to leave them to freeze and rot on the vine. When harvesting, use a sharp knife or pruners to cut the stem, leaving a few inches attached if possible (at least 2-4 inches). This stem acts as a natural seal, helping with storage and significantly reducing the risk of spoilage and infection.
- Cleanliness is Key: Gently brush off any dirt or debris clinging to the pumpkin. You can wipe them down with a damp cloth if necessary, but avoid harsh scrubbing or using soaps that might damage the protective outer skin. A clean surface helps prevent mold growth and allows you to better inspect for imperfections.
- Inspect for Damage: Carefully examine each pumpkin for any cuts, punctures, soft spots, or signs of rot. Pumpkins with significant damage are less likely to ripen successfully and can quickly become a source of mold that could spread to other fruits. It’s best to use these damaged pumpkins immediately (if the damage is minor and localized) or compost them if they show extensive spoilage.
- Optimal Indoor Placement & Airflow: Once cleaned and inspected, place your pumpkins in their chosen warm spot. Crucially, ensure there is good air circulation around each pumpkin. Don't stack them or place them too close together, as this traps moisture and creates a prime environment for mold. If possible, elevate them slightly off the surface to allow air to circulate underneath – you can use old towels, cardboard, or even a wire rack for this purpose. Good airflow is paramount in minimizing the chances of mold and rotting, especially when ripening indoors.
Maximizing Your Chances: Tips for Success and What to Expect
While the indoor ripening trick is simple, a few additional practices can significantly improve your success rate and yield beautifully orange pumpkins.
The Role of Sunlight (Indirect is Best)
While warmth is the primary catalyst, indirect sunlight certainly helps to simulate natural conditions. If you have a spot near a window that gets some natural light, that's ideal. However, avoid direct, intense sun that could overheat the pumpkin, potentially leading to soft spots, sunburn, or even prematurely breaking down the fruit tissue. The goal is gentle encouragement, not a rapid bake.
Rotate for Even Ripening
Just like turning a roast for even cooking, rotating your pumpkins every few days can help ensure an even orange color. If one side is consistently facing away from the warmest or brightest spot, it might ripen slower. Gently turn the pumpkin so that the greenest side receives more of the ambient warmth and light. This continuous exposure helps the chlorophyll break down uniformly across the fruit. For more insights on leveraging warmth and sun, check out: Ripen Green Pumpkins: Use Warmth & Sun for Perfect Orange.
Maintain Consistent Warmth
Fluctuations in temperature can slow down the ripening process or even cause stress to the pumpkin. Aim for a consistent indoor temperature, ideally above 60°F (15°C) but below 75°F (24°C). This range provides the optimal conditions for enzymatic activity without causing the pumpkin to dry out or cook. Avoid placing pumpkins near drafty doors, air conditioning vents, or active heat registers that might expose them to sudden temperature changes.
Monitor for Mold and Soft Spots
Regularly check your ripening pumpkins for any signs of mold, rot, or soft spots. Even with good airflow, an underlying issue or undetected damage can sometimes lead to spoilage. Address any problems immediately; if a pumpkin shows significant signs of rot, it’s best to remove it to prevent contamination of other ripening fruit. A small soft spot can quickly turn into a significant issue, so early detection is key.
Managing Expectations: How Green Is Too Green?
It's important to set realistic expectations. While this method is highly effective, a pumpkin that is extremely green and underdeveloped might not ripen into a perfect, deep orange. Very immature pumpkins may turn a pale yellow or a muted orange, or they might simply rot before they get there, especially if they haven't started to develop any orange pigments on the vine. However, even these can still be decorative and a testament to your efforts. Pumpkins that have begun to show even a hint of orange are typically excellent candidates for indoor ripening and have the highest chance of achieving full color.
What to Do After They Turn Orange
Once your pumpkins have achieved their desired orange hue, the possibilities are endless! They can continue to serve as beautiful seasonal decorations, adding warmth and color to your home for weeks, sometimes even months, if stored properly in a cool, dry place away from direct sunlight. Alternatively, they are now perfectly ready for carving into Jack-o'-lanterns or, even better, for culinary purposes. Freshly ripened pumpkins are fantastic for making homemade pumpkin puree, which can then be used in pies, soups, breads, and countless other delicious autumn recipes. November and December are wonderful months to enjoy the fruits of your labor both decoratively and gastronomically.
Don't let an early frost or unforeseen gardening challenges rob you of your precious pumpkin harvest. With this simple, frost-proof trick, you can confidently bring your green pumpkins indoors and watch them transform into beautiful, vibrant orange symbols of autumn. A warm spot, good air circulation, and a little patience are all you need to save your season and enjoy your homegrown gourds to their fullest. So go ahead, rescue those green beauties, and get ready to celebrate pumpkin season like a pro!
